7 Steps to Make Vector Image in Adobe Illustrator

Planning to place any design or image on your apparel? But before you place the image on the apparel on any other product, you need to make a vector image. For your information, there are two different types of digital images. One is raster and the other is vector. The raster images are composed of pixels and they contain a great number of details. But you are not able to enlarge them because they will lose their quality. On the other hand, vector images are made of lines and shapes. They are having fewer details but you can scale them according to your need without losing any quality.
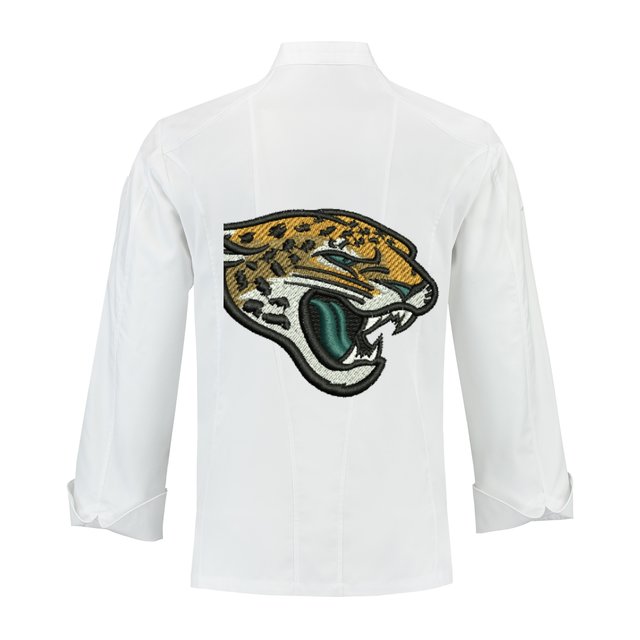
It is important to note that we need vector images for various purposes. Embroidery digitising is also one of the jobs that require vector images so that high-quality design or artwork can be placed on the objects. So, if you are looking to hire professionals to avail of the vector conversion services, then you need to connect with a professional company like Absolute Digitizing for the best results. The company is having years of experience and the price for the work is $1/1000 stitches.
Note that in a majority of the cases, you will get raster images. The images we see on the internet, pictures we click using our mobile, or find on other platforms, all are raster. But before you use, you have to do the conversion to make a vector image. This process of conversion is called vectorize and you can use tools like Adobe Illustrator, Corel Draw, and more.
Vector Image
The vector graphics convey color utilizing scalable color polygons. These pictures are using the dynamic color selection as compared to the static squares in a raster image. In the case of vector images, you will get crisp colors and perfect lines.
The geometry behind the images is formulaic and this makes them resolution-independent. You don’t have to worry about the loss of quality because your image will remain intact no matter what either you increase or decrease the size. Furthermore, if you are looking to avail embroidery digitizing services, then once your design is ready, then you need to digitize it using embroidery digitizing software. Some popular software includes Tajima DG/ML by pulse, Wilcom, Embrilliance Stitch Artist, and many more. After this install the design in embroidery machine using USB and then you will get your design, logo, or image on sew-outs.
Process of Conversion
Now, we will be looking at the process that you should do when converting the image in the Adobe Illustrator:
1-Choose Image to Convert
Irrespective of the image you are going to choose, the process will be the same. But if you are having a large picture, then you need more time to do complete the conversion. There are few images that work better as vector images as compared to any other form.
Note that it is better to edit a single subject in comparison to the landscape to make a vector image. The image should be having a white or transparent background and it should have a low resolution.
2-Choose Image Trace Preset
Illustrator is having special tool that will help you to make a vector image. The tool is known as Image Trace and it will come with a range of presets to perform the work automatically. It is recommended to choose the preset that resembles closely to the type of image.
Your options will be:
Low and High-Fidelity Photo: This will be producing more vector images with more details and fewer details. This is ideal for photos or complex artwork.
Shades of Grey: This preset will produce a detailed gray scale image.
3,6, and 16 Colors: These will preset output vector images with three, six, and sixteen colors. This is perfect for logos with lots of flat colors.
Sketched Art, Silhouettes, Technical Drawing, and Line Art: Best for a specific type of images and will create black and white line-based drawings.
Black and White Logo: This will create a simple logo using two colors black and white.
You need to open your image illustrator and choose the image to activate the image options. These options are present on top of your illustrator window. You have to click on the drop-down menu next to Image Trace for selecting your Preset and choose the option according to your needs.
3-Vectorize Image with Image Trace
After clicking on the button, your image will automatically go to the tracing process to make a vector image. You may note some changes in your image but as a whole, it will be the same.
4-Fine Tune the Traced Image
Done with the tracing, now you need to open Image Trace Panel to tune the conversion. You need to select the Mode for switching between colors, greyscale, black, and white. You also need to drag the colors slider toward left for simplifying your vector image or to right for adding more details.
If you are happy with the setting, then you need to re-use it. Click the Manage Presets button near to your Presets options. After this, you can save your setting as a new Preset.
5-Ungrouping the Colors
Your image is now ordered into colored shapes that fit well with the original raster image. To complete your vector, you have to separate color groups to edit them. For doing this, select your traced image and click on the Expand button on top of the window.
After this, you will be able to view composite shapes that will make a vector image. Each shape will be outlined in blue. Next, you have to right-click the image and select Ungroup from the menu. Now, you can separate your color shapes into individual parts.
6-Editing the Vector Image
After the conversion, you are having free range to edit the image. You can start by deleting the color groups according to your desire. You can choose color groups by clicking on shape and head to Select>Same>Fill Color. This will select all groups within the same color as selected using the Direct Selection tool.
After this, you can hit Backspace to delete the space. If you want to modify any color group, then you will be selecting a layer using the Direct Selection Tool. To fill the empty spaces or to add additional color in your design, you have to use Brush or Pen tools.
7-Saving the Image
Now your image is ready. You can save it in various vector formats like AI, PDF, SVH, or more. Once you are done, move to File>Export> Export As.
Hope now you are aware of the process of how to make a vector image. Furthermore, if you are looking to digitize your image for embroidery purposes, then you should hire expert embroidery digitizing service of Absolute Digitizing to get the desired results. The services will be provided within an affordable cost and timely delivery.
Connect Today To Kick Start Your Project!
The post 7 Steps to Make Vector Image in Adobe Illustrator appeared first on Absolute Digitizing.
from Absolute Digitizing https://ift.tt/38Hv0Od
via IFTTT


Comments
Post a Comment